


You know how a Jeep Wrangler can feel unstoppable off-road, right up until the sun drops and your stock halogen bulbs start turning everything into a gray blur.
If you do any real nighttime driving, on trails or on the highway, a smart headlight upgrade is one of the highest-impact changes you can make.
This guide breaks down why led headlights help, which upgrade path makes sense for your Jeep Wrangler (JL, JK model, or Gladiator JT), what specs actually matter, and how to install and aim your lights so you see more without blinding everyone else.
Key Takeaways
- For many Wrangler halogen setups that use an H13/9008 bulb, a standardized H13 spec lists roughly 1,100 lumens on low beam and 1,700 lumens on high beam, so big visibility gains come from better optics and beam control, not just marketing numbers.
- Headlight upgrades work best when you treat the headlamp as a complete optical system: the right housing (often projector) plus the right light source is how you get reach and a clean cutoff with less glare.
- IP67 means dust-tight protection plus temporary water immersion at 1 meter for 30 minutes, so it is a solid minimum for off-roading and wet weather.
- If your Jeep headlights flicker after a headlight upgrade, it is often a PWM or CAN bus issue. A purpose-built anti-flicker harness or load resistor setup can stabilize power and prevent dash errors, but only if it matches your Jeep model and connector style.

Benefits of Upgrading to LED Headlights on Your Jeep Wrangler
A headlight upgrade is not just about “brighter.” On a Jeep Wrangler, the real win is a beam pattern you can trust: a wider usable spread, a clearer cutoff, and less stray light bouncing into dust, rain, and oncoming lanes.
When you pick the right automotive lighting setup, you reduce fatigue, improve reaction time, and get more confidence on dark roads and on offroad trails.

Enhanced Nighttime Visibility
Stock halogen headlights tend to fade into the background on unlit roads, especially once your lenses haze or your housings vibrate out of aim after off-roading.
A quality LED setup gives you a cleaner, more even field of light. You spot road texture, ruts, and trail edges earlier, and you read signs sooner without having to overdrive your low beams.
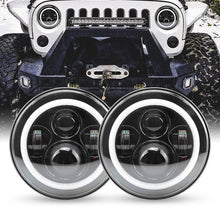
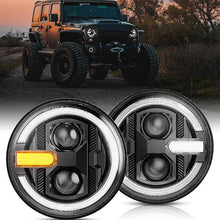
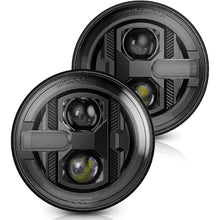
- Best-case upgrade for real visibility: a complete, DOT-marked headlamp assembly (often a 7-inch LED headlight for Wrangler round housings) designed around LEDs from the start.
- Most common mistake: dropping led headlight bulbs into a reflector made for halogen bulbs and expecting the pattern to stay controlled.
- Simple reality check: park 25 feet from a wall and compare the cutoff before and after. If the “after” looks like a fuzzy blob, the road will look worse than you think, and glare will be higher than you realize.
Brightness is easy to buy. Useful light is what keeps you safe.

Improved Safety on the Road
Safety comes down to two things: you need distance to react, and other drivers need you to keep glare out of their eyes.
That is why beam control matters more than a flashy “lumens” claim. A sharp cutoff line and a stable hot spot keep light where it belongs, on your lane and your shoulder.
In the U.S., FMVSS 108 is the baseline federal standard for road-legal headlamps, and NHTSA has repeatedly stated there is no provision to make an LED bulb a legal replacement inside a halogen headlamp that was certified for a filament bulb, which is why many serious Wrangler builds move to a complete DOT-marked headlamp assembly instead of a bulb-only swap.
- Glare control tip: if your new lights make reflective signs “sparkle” from far away, you probably have too much foreground light or too much upward scatter.
- Practical buying filter: look for housings that are built to manage glare (projector optics, well-defined cutoff, stable mounting), then aim them carefully after install.

Better Performance in Adverse Weather
Bad weather exposes weak lighting fast. Rain, snow, and dust do not just reduce visibility, they also punish poor beam patterns by reflecting stray light back at you.
For offroad use, focus on weather sealing and beam control first, then color temperature. A clean cutoff and tight pattern usually help more than chasing the bluest light you can find.
- What to look for: sealed housings, sturdy vents, and gaskets that do not pinch when you reinstall the grille.
- Off-roading reality: deep puddles and pressure-washing are tougher than normal rain. If the housing breathes poorly, you get condensation that kills output and shortens durability.
If you shop through ads or online advertising, including on Facebook and other Meta products, do not trust the photo. Verify the ingress rating and the markings on the lens, then make the call.

Longer Lifespan Compared to Stock Halogen Bulbs
Halogen bulbs fail like a light switch, one day they are fine, the next day the filament is gone. Many standard 9008 (H13) halogen specs are measured in the hundreds of hours for rated life, which is why frequent nighttime driving can turn replacements into a routine chore.
LED systems usually do not “pop” the same way. Their output tends to fade over time, and heat is the real enemy. That is why the cooling system (heat sink design, fan quality, and driver placement) matters for long-term reliability.
- Durability tip: choose an LED design that can shed heat without being crammed against the dust cap or wiring, since trapped heat is a fast path to early dimming.
- Ownership tip: if one halogen bulb burns out, replace both. If you upgrade, upgrade both sides at the same time so your beam color and intensity match.
Types of Headlight Upgrades for Jeep Wranglers
Most Jeep modifications fall into one of three buckets: bulb swaps, full headlamp assemblies, or adding dedicated auxiliary lights for offroad use. Each can work, but they solve different problems.
Your Jeep Wrangler JL, JK model, or Gladiator JT may also have different connectors or factory options, so you want to confirm fitment before you buy.
LED Headlights
LED upgrades come in two very different forms, and the difference matters more than the brand name on the box.
- LED replacement bulbs: these replace halogen bulbs inside your existing housing. They can look bright in the driveway but often struggle to keep a clean beam pattern in reflector optics.
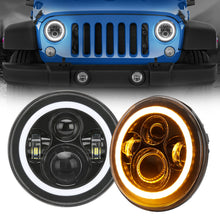
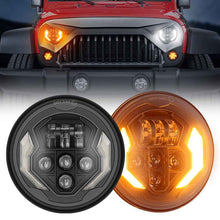
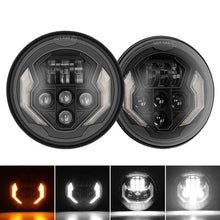
- Complete LED headlamp assemblies: these replace the entire optical unit (lens and reflector or projector). This path is the most consistent way to improve nighttime driving while controlling glare.
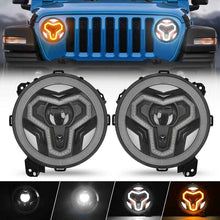
If you want brand examples that Wrangler owners commonly cross-shop, you will see names like Hikari LED conversion kits, elite led headlights by diode dynamics, xprite 7-inch led headlights, rough country led headlights, archaic full led headlights, and sunpie 9-inch diamond series rgb halo led headlights.
A practical pro-tip that comes up often in owner forums is to prioritize LED designs that keep the LED emitters positioned where the halogen filament would sit, and to consider a setup with an external driver if your dust cap area runs tight, because driver heat can be part of the failure story.

HID (High-Intensity Discharge) Headlights
HID headlights (xenon) use a ballast and an arc-based bulb to create light. They can throw a lot of usable light downrange, and many drivers like their contrast.
The trade-off is complexity. You are adding ballasts, igniters, and extra wiring, and HIDs typically need a warm-up period before they reach full output. A Philips automotive lighting reference notes that HID systems have a warm-up period measured in seconds rather than instant full brightness.
- Best use case: projector housings designed for HID, with clean wiring and stable mounting.
- Common pitfall: HID conversion kit installs in halogen reflectors that create glare and scatter.
- Color temperature note: many OEM-style HID setups live near the low 4000K range for a neutral white that still reads well in poor conditions.
Projector Headlights vs. Reflector Headlights
If you care about cutoff and glare control, optics matter as much as the light source. Projectors tend to create a more defined beam shape, while reflectors are more sensitive to light-source geometry.
| Feature | Projector Headlights | Reflector Headlights | Notes |
|---|---|---|---|
| Beam Focus | Use a lens to concentrate light into a controlled pattern. | Use a mirrored bowl to direct light, with broader scatter. | Projectors usually make it easier to keep light on the road instead of in the trees. |
| Cutoff Line | Typically produce a sharper cutoff that reduces glare. | Often have a softer edge that can increase glare if the light source is mismatched. | A sharp, stable cutoff is a strong indicator your setup is aimed and behaving correctly. |
| Compatibility with Upgrades | Often more forgiving with higher-intensity sources. | More sensitive to LED/HID geometry changes. | If your reflector housing was built for halogen bulbs, bulb swaps can be a glare trap. |
| Performance in Weather | More controlled beam reduces backscatter from rain and dust. | More stray light can reflect back in heavy rain, fog, or trail dust. | Controlled light is easier on your eyes on long night drives. |
| Glare Management | Designed to limit upward light when aimed correctly. | More likely to create glare if the bulb is misaligned or oversized. | Glare is not just rude, it can trigger failed inspections in some states. |
| Typical Use Cases | Common in purpose-built LED and HID headlamp assemblies. | Common in stock halogen headlight designs. | For many Jeep Wranglers, a full assembly upgrade is the cleanest path to projector-like control. |
| Installation Notes | Precise aiming matters to preserve the cutoff. | Aiming still matters, but the pattern is less defined. | Either way, aim after installation and recheck after your first offroad trip. |
Key Features to Look for in Upgraded Headlights
If you shop by marketing claims alone, you will end up with glare, flicker, or a beam that looks bright up close but does not actually help at speed.
Use these features to filter your options, and you will land on a setup that feels like a real upgrade on your Jeep Wrangler, not just a new color of light.
Brightness and Light Spread
Ignore “monster lumens” unless the brand provides real beam data. In practice, a controlled pattern and a stable cutoff are what make nighttime driving safer.
If your Wrangler uses an H13/9008 halogen bulb, a standardized bulb spec lists roughly 1,100 lumens on low beam and 1,700 lumens on high beam, which is why optics and aiming are the big levers for usable distance.
- For highway use: prioritize down-road reach with a clean cutoff, so you get reaction time without lighting up tree branches.
- For off-roading: you still want controlled low beams, then add dedicated offroad lighting for the trail when you are not sharing the road with traffic.
- Quick self-test: do a wall test at 25 feet. Aiming charts used for inspections commonly use this distance and allow only a few inches of vertical variation before they flag it as out of spec.
Weatherproofing and Durability
Weather sealing is not a luxury on a Wrangler. Mud, water crossings, road salt, and pressure washers all find weak seals.
As listed in IEC 60529 style IP definitions, IP67 means dust-tight protection plus temporary immersion at 1 meter for 30 minutes. For frequent off-roading, that baseline helps you avoid moisture intrusion that leads to fogging and corrosion.
- Look for: a solid rear housing, quality gaskets, and a vent design that manages condensation.
- Avoid: housings with thin wiring pass-throughs and loose rubber boots that do not seal after you reinstall the grille.
Color Temperature for Clearer Visibility
Color temperature is the “shade” of white. For most drivers, a neutral white beam is the sweet spot because it keeps contrast high without turning everything cold and harsh.
- Neutral white: often around 5000K to 6000K, which can feel crisp for sign reading and lane definition.
- Slightly warmer white: often closer to the low 4000K range, which some drivers find less fatiguing in rain and haze.
Whatever you choose, prioritize beam pattern quality over chasing the bluest color. A clean cutoff with the right aim will beat a “cooler” bulb every time.
Compatibility with Your Jeep Model
Compatibility issues are where many installs go sideways. Wrangler electrical systems can use pulsed power (PWM), and that can create flicker or CAN bus errors with some aftermarket headlights.
- JK model note: some anti-flicker harnesses are designed specifically to address PWM-related flicker on Jeep JK model years that use H4/H13 style setups.
- JL note: JL trims vary by year and factory package, so verify connector style and whether you are replacing a bulb or a full assembly before you order.
- Tool tip: an OBD-II scan tool helps you confirm whether you triggered a lighting-related fault after the install, especially if you added load resistors.
How to Install New Headlights on Your Jeep Wrangler
You can install many Wrangler headlight upgrades with basic hand tools. The big keys are safe handling, solid electrical connections, and proper aiming at the end.
Plan on taking your time the first time. A clean install is how you avoid flicker, loose grounds, and glare complaints later.
Remove the Stock Headlights
Turn off the engine, remove the keys, and let the headlights cool before you touch anything. Wear gloves so you do not slip and damage a connector.
- Remove the trim or grille access needed to reach the headlamp housing, using the appropriate screwdriver and socket.
- Disconnect the factory wiring harness by pressing the connector tab and pulling straight back.
- Remove the retaining bolts or ring, then pull the headlamp or bulb straight out without yanking the harness.
- If you are removing halogen bulbs, avoid touching the glass. Oils and hot spots can shorten bulb life.
- Inspect the housing seals and wiring for corrosion, then clean debris so the new unit seats flat.
Install the Upgraded Headlights
Focus on fitment and wiring first, then worry about aim. A headlight upgrade that is slightly loose will drift out of alignment the first time you hit washboard trails.
- Seat the new headlight or bulb fully, then secure mounting points evenly so the housing does not twist.
- Use a multimeter to confirm stable voltage and a clean ground before you button everything up.
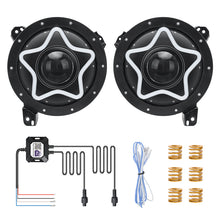
- If your setup needs an anti-flicker harness or load resistor, install it neatly, secure it away from heat, and keep connectors fully locked.
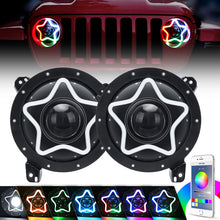
- Reconnect any DRL or halo wiring (common on options like sunpie 9-inch led halo headlights or halo-style assemblies), then tuck excess cable so it cannot chafe.
- Apply dielectric grease to connectors if you drive in rain, snow, or salt to slow corrosion.
Adjust and Test for Proper Alignment
Aiming is where most “bright” headlights become safe headlights. Do this step every time you change housings, change suspension height, or do body work.
- Park on level ground facing a wall, then measure 25 feet from the wall to your headlight lenses.
- Mark the centerline of each headlight on the wall with tape, then turn on low beams and observe the cutoff.
- Adjust slowly. Small turns make a big difference, and the goal is a controlled cutoff that does not shoot upward into oncoming traffic.
- Road-test on a quiet street, then recheck on the wall to confirm nothing shifted under vibration.
- If you cannot get a clean cutoff, reassess the housing and light source pairing. This is a common sign of mismatched led headlight bulbs in halogen headlights.
Maintenance Tips for Optimized Headlight Performance
Good headlights still need upkeep, especially on a Wrangler that sees dust, mud, and vibration. A few simple checks keep your output consistent and protect durability.
You do not need a shop for most of this, but you do need consistency.
Regular Cleaning and Inspection
Clean your lenses and do a quick inspection at least monthly, and after any hard off-roading trip. A dirty lens can make even premium aftermarket headlights look weak.
- Wash lenses with mild soap and water using a microfiber cloth, then rinse thoroughly.
- Check for cracks, haze, and water intrusion. Fogging inside the lens is a warning sign that seals or vents are failing.
- After cleaning, do a quick wall check to confirm your beam pattern did not drift.
- Inspect wiring connectors for corrosion and bent pins, then correct issues before you get flicker on a dark road.
- If lenses are cloudy, use a restoration kit and finish with a UV protectant, since oxidation can cut usable light fast.
Check and Realign Headlights as Needed
Alignment is not a one-time job on a Jeep. Suspension changes, heavier bumpers, winch installs, and trail impacts can all change aim.
- Recheck aim every 6 months, and any time you change ride height, add weight to the front end, or notice new glare from signs.
- Use the 25-foot wall method, then validate on-road so you do not over-aim and create glare.
- If you run a lift or heavy front accessories like a Warn winch, expect to re-aim more often.
- Log your adjustments so you know whether drift is gradual (normal) or sudden (loose mounting or damage).
Ensure Electrical Connections Are Secure
Electrical problems often look like bad bulbs. In reality, most flicker and dimming comes from loose grounds, marginal connectors, or heat-stressed drivers.
- Check connector voltage under load with a volt meter, since a weak connection can drop brightness even when the bulb is fine.
- Clean light corrosion off terminals and ensure locking tabs fully seat.
- Secure grounds tightly. Bad grounds can trigger dimming, flicker, or dash warnings.
- Inspect wiring looms for chafing near sheet metal edges and repair with heat-shrink tubing.
- If your LED has a fan-based cooling system, listen for changes in fan noise, since fan failure can lead to rapid output loss.
Conclusion
A headlight upgrade on your Jeep Wrangler is one of the simplest ways to make nighttime driving safer and less stressful.
If you choose led headlights with controlled optics, solid weather sealing, and a wiring setup that plays nicely with your Jeep's electrical system, you get better visibility with less glare and stronger durability for off-roading.
Pick the right fit, aim them carefully, and you will feel the difference every time the road goes dark.

FAQs
1. Why should I upgrade my Jeep Wrangler headlights for night driving?
Upgrading your Jeep Wrangler headlights boosts visibility, it helps you spot hazards sooner and it improves safety for you and others. Stock lights often have weak beam pattern and short range, so a headlight upgrade fixes that.
2. Will brighter headlights blind other drivers?
Not if you pick the right kit and aim the beam correctly, modern bulbs can be bright without adding glare. A proper beam pattern directs light down the road, not into oncoming eyes.
3. What headlight options work best for a Wrangler?
Choose quality replacement kits that match your housing and focus on beam pattern and durability, not just raw brightness. Modern bulb options often run cooler and last longer than legacy bulb choices, and some kits include better reflectors or lenses.
4. Is installation hard and are there legal checks I should do?
Most upgrades fit with basic tools and take about an hour for a single side, but test the aim after install and adjust as needed. Check local rules for allowed bulbs and make sure the headlight upgrade keeps your Jeep Wrangler safe and road legal.