
The Ultimate Jeep Headlight Installation Guide (JL / JT / JK Models)

The Ultimate Jeep Headlight Installation Guide (JL / JT / JK Models)
Step-by-step instructions for Wrangler and Gladiator owners
Audience
This guide is designed for Jeep owners and DIY enthusiasts with basic hands-on experience and access to standard tools.
⚙️ Important Safety Reminder
Before starting, always disconnect the negative terminal of the battery to prevent short circuits or triggering ECU errors.
If your installation involves running wires through the firewall, reprogramming the ECU, or modifying the CAN bus configuration, seek professional help.
All instructions below are based on Led Factorymart installation kits and verified community experience.

🧰 Preparation (All Models)
Required Tools
-
Phillips / Flathead screwdrivers
-
Torx bits: T15, T20, T25 (depending on screw type)
-
8mm and 10mm sockets with ratchet
-
Wrenches or Allen keys (if needed)
-
Plastic trim removal tools (to avoid scratching clips)
-
Electrical tape, insulation tape, and zip ties
-
Multimeter (for testing voltage and ground)
-
A flat wall and level ground (for headlight aiming)
🚗 Step-by-Step for JL (2018+) and JT (2020+)
(Wrangler JL and Gladiator JT share almost identical wiring and mounting structures)
Led Factorymart headlights are designed as Plug & Play solutions with dedicated harnesses to eliminate error codes or flickering.
Installation Steps
1.Open the Hood – Secure it with the prop rod.

2.Disconnect the Battery – Remove the negative terminal first.
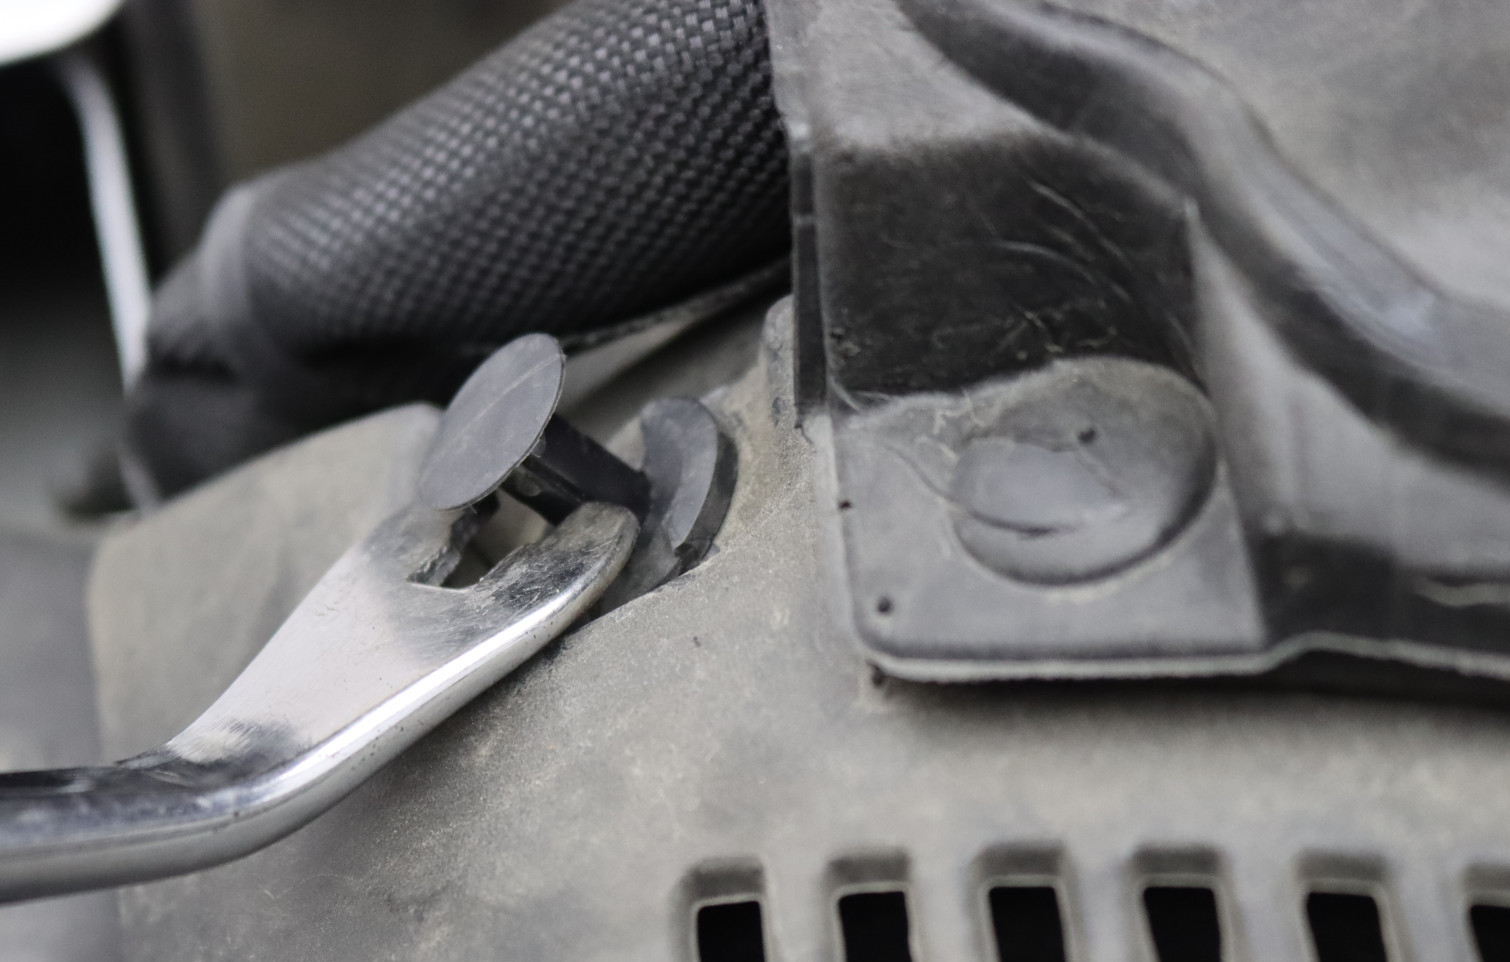
3.Remove the Front Grille – Use a plastic trim tool to pop out the clips carefully.

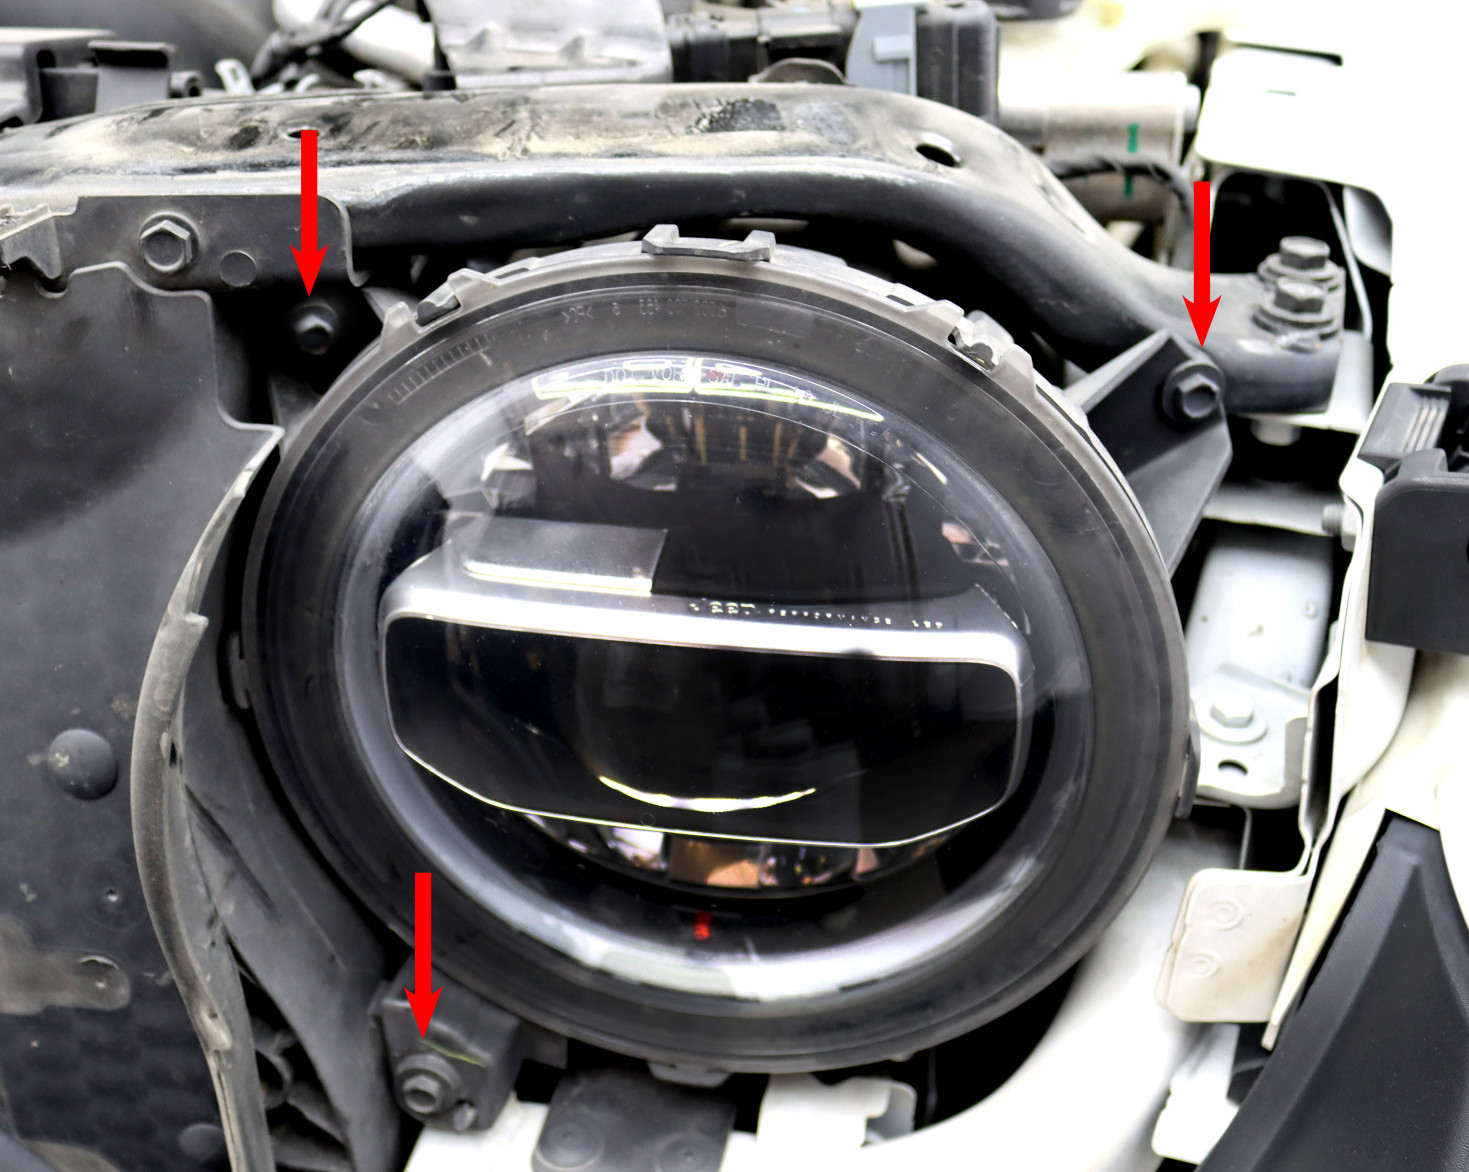
4.Unbolt the Factory Headlights – Use Torx (T15 or T20) to remove 3–4 screws and unplug the connectors.
5.Prepare the New Headlights – Do a quick “dry fit” test to ensure plug compatibility.
-
Connect DRL and Turn Signal Wires
-
Left Front (Driver Side)
-
Turn Signal → White/Green
-
Parking Light → White/Brown
-
DRL → White/Yellow
-
-
Right Front (Passenger Side)
-
Turn Signal → White/Tan
-
Parking Light → White/Orange
-
DRL → White/Dark Blue
-
-
DRL Circuit Notes
-
OEM halogen models use a separate BCM output for DRL.
-
Aftermarket LED headlights (with Halo or DRL rings) should connect to White/Yellow or White/Dark Blue wires, or to an ACC/Ignition power source for “always on.”
-
If your headlight includes RGB or Halo effects, use an inline fuse and relay isolation.
Testing and Troubleshooting
-
Use a multimeter to confirm voltage on each wire:
-
Parking lights ON → 12V on White/Brown or White/Orange
-
Turn signals ON → Pulsing 12V on White/Green (left) or White/Tan (right)
-
Ignition ON (no lights) → 12V on White/Yellow or White/Dark Blue (DRL)
-
-
Verify that all grounds (usually Black or Gray) connect securely to metal.
-
Note: Some 2018–2020 JL North American models may have DRL disabled in BCM; a Tazer JL programmer can enable it.
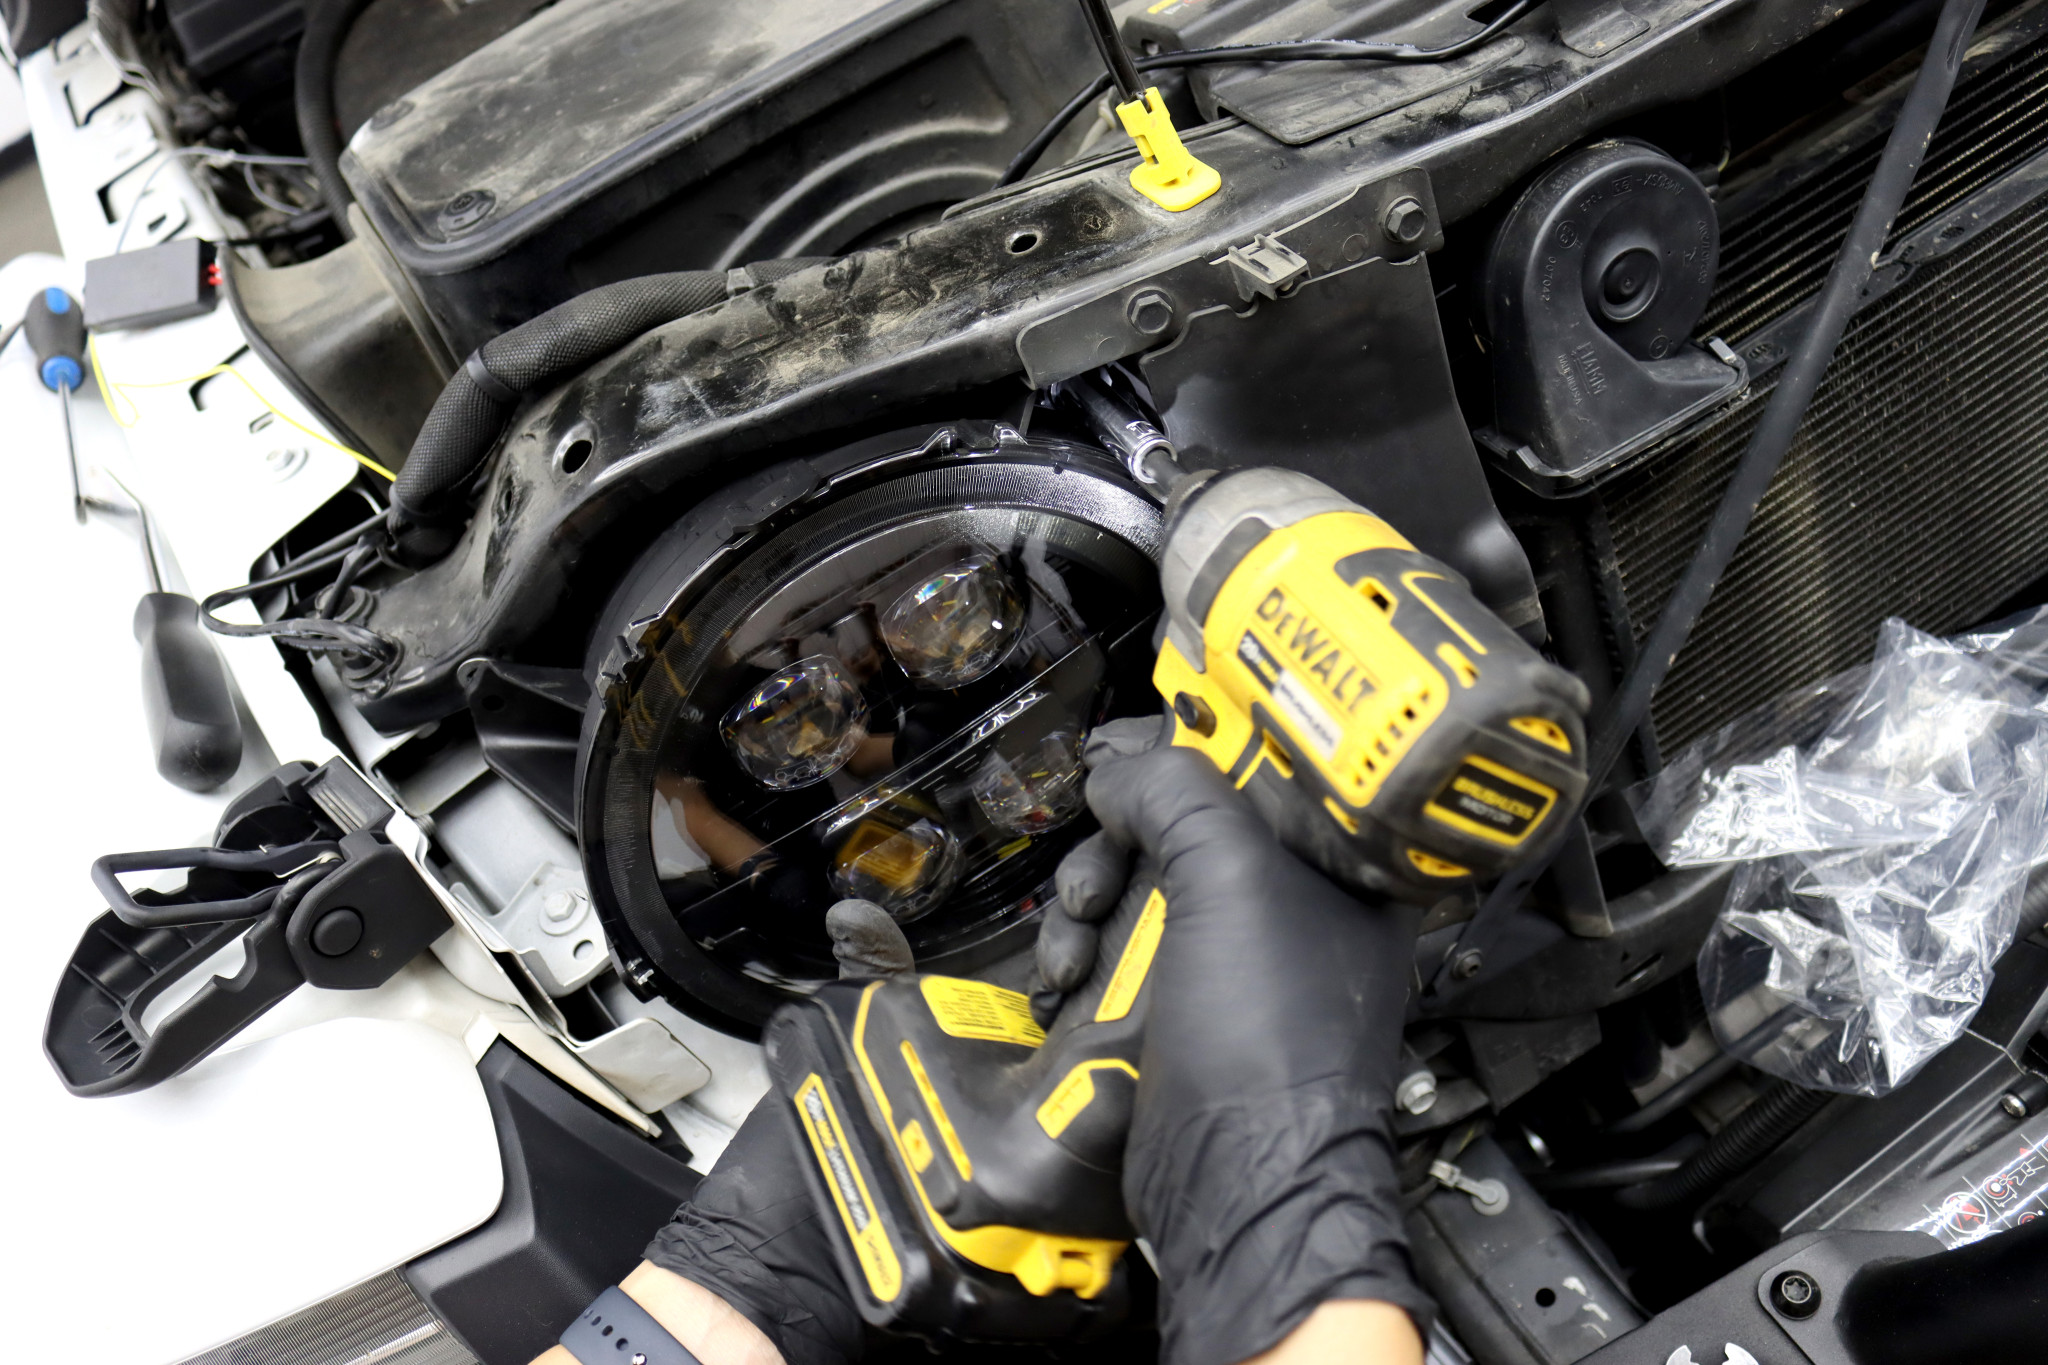
Secure the New Headlights – Align and tighten all mounting screws evenly.
-
Reconnect Battery & Test – Check low beam, high beam, DRL, and turn signal. If flickering or error codes appear, install the included anti-flicker harness from Led Factorymart.
-
Seal & Protect – Wrap all exposed wire ends with electrical tape and ensure watertight connectors.
-
Headlight Aiming – Park 25 feet (7.6m) from a wall. Adjust beams per manufacturer’s spec.
- Finalize Installation – Reattach grille and clips, check all fasteners, and log installation details for warranty.
🛠️ JK (2007–2018 Wrangler) Step-by-Step Installation
The JK uses a different mounting system but remains the most common 7-inch headlight swap among Jeep owners.
Installation Steps
①Disconnect the Battery (negative terminal).

②Remove Grille Clips – Pry out six upper plastic clips with a trim tool.

③Unbolt Factory Headlights – Use Torx (T15/T20) to remove the retaining ring screws.


④Using a Torx T-15 driver, remove the 4 retaining ring screws securing your factory headlights in place.

④Disconnect Wiring Harness from the back of the headlight.

⑤ Prepare the New Headlight
Unpack the new Led Factorymart headlight and check all accessories.
Most models include an H4 adapter or direct-fit plug for simple plug-and-play installation.
If your headlight features a Halo or DRL ring, connect the DRL (white/yellow or white/blue wire) to an ignition-on or fused ACC power source, as specified in the manual.
Ensure all wires are secure and insulated before installation.
⑥Install and Align – Insert the new LED light, align tabs, reinstall retaining ring, and tighten screws.

⑦Reconnect Wiring and test all light functions.

⑧Reinstall Grille and all clips securely.

⑨Aim Your Headlights on a flat wall for proper beam pattern.
(If your JK is newer, you may also need to release the small red safety tab on the factory connector before unplugging.)

⚡ Technical Notes: Flickering & Error Codes
-
Switching from halogen to LED changes circuit resistance, causing the Jeep’s CAN bus to think a bulb has failed.
-
Led Factorymart includes a built-in anti-flicker harness that stabilizes voltage and prevents warning lights.
-
OEM LED upgrade kits often require software programming and full rewiring — far more complex than Led Factorymart’s plug-and-play system.
🔧 Final Aiming and Night Test
-
Park 25 feet (7.6m) from a flat wall.
-
Mark beam centers with tape. Adjust height so the beam pattern sits slightly below center.
-
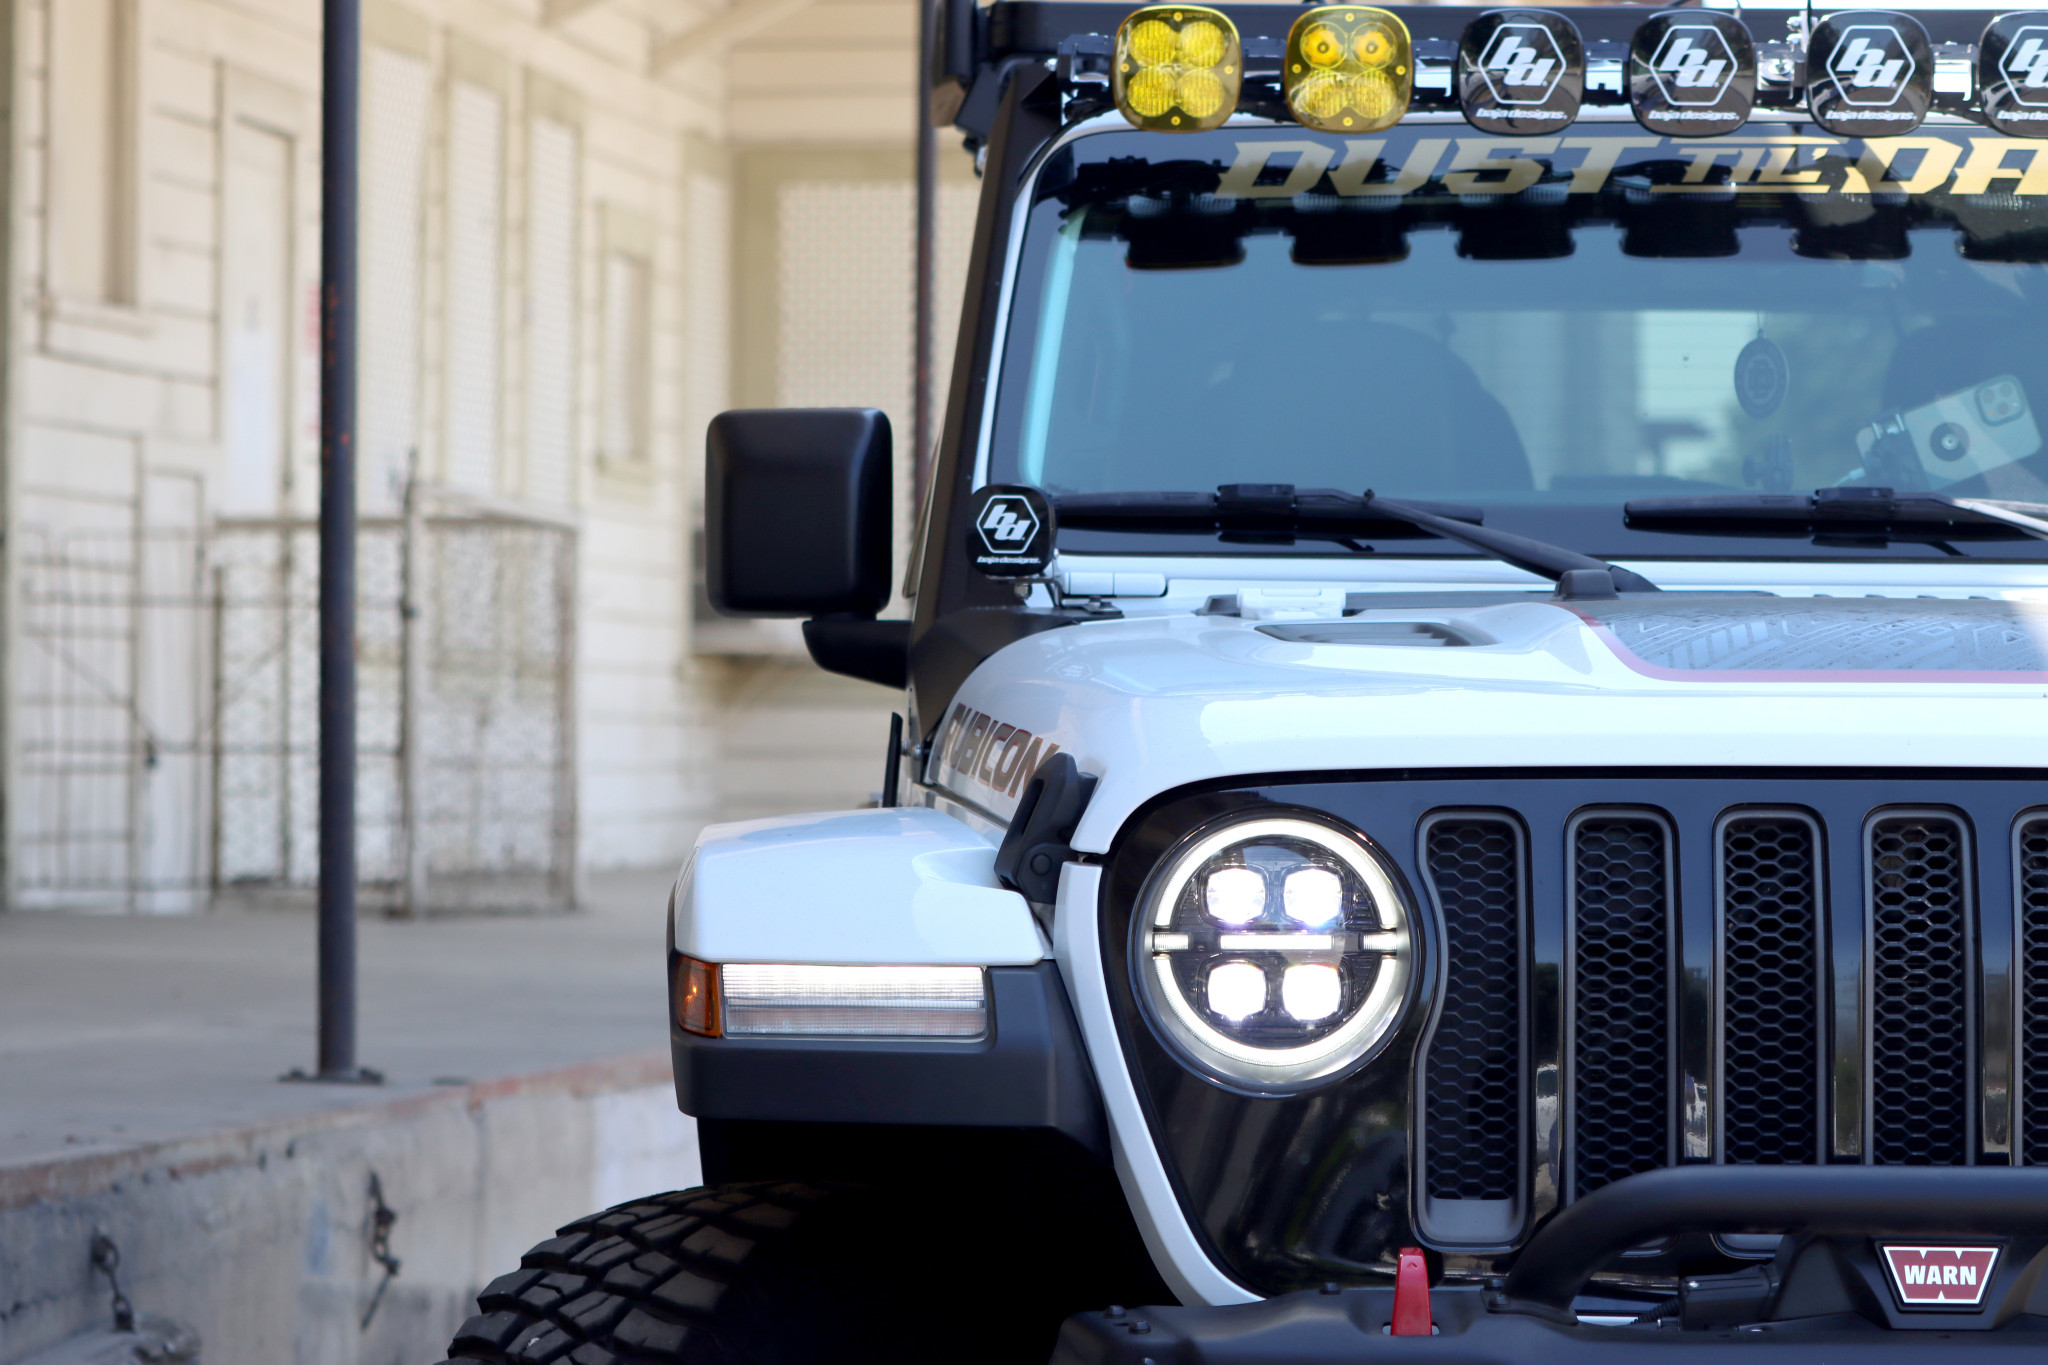
Test both low and high beams at night — confirm even illumination and no glare to oncoming traffic.
🧭 Quick Troubleshooting Guide
| Symptom | Possible Cause | Solution |
|---|---|---|
| Flickering or warning light | CAN bus resistance mismatch | Use the Led Factorymart anti-flicker adapter |
| Light won’t turn on | Reversed connector or blown fuse | Check polarity and fuse box |
| DRL or Turn not working | Miswired connection | Verify color mapping per model |
| Moisture inside lens | Incomplete seal | Reapply silicone or RTV if necessary |
🏁 Conclusion: Why Choose Led Factorymart
Installing headlights shouldn’t be complicated — and with Led Factorymart’s precision-engineered Plug & Play kits, it isn’t.
Each headlight set is tested for Jeep JL, JT, and JK compatibility, includes vehicle-specific wiring harnesses, and offers:
-
💡 Error-free installation (CAN bus ready)
-
⚡ Anti-flicker protection built in
-
🧩 Direct OEM connectors – no cutting or splicing
-
🛠️ Detailed PDF & video guides for every Jeep model
-
💬 Dedicated technical support team ready to help with wiring or aiming
With Led Factorymart, you get more than headlights — you get a professional-grade lighting upgrade designed for durability, clarity, and simplicity.
Light up your next adventure — confidently, safely, and stylishly.